Welcome to the exciting journey of building your very own Long Langstroth Beehive! Before we dive into the construction process, let’s take a moment to understand what makes the Long Langstroth beehive unique.
What is a Long Langstroth Beehive?
The Long Langstroth beehive is a horizontal variation of the traditional Langstroth hive, designed to provide a more natural and accessible environment for bees. Unlike the standard Langstroth hive, which stacks boxes vertically, the Long Langstroth hive organizes frames side by side. This innovative design offers several advantages:
- Horizontal Layout: The frames are arranged horizontally, allowing for easier access during hive inspections and honey harvesting. This design reduces the need for heavy lifting associated with traditional vertical hives.
- Natural Comb Building: The horizontal configuration closely mimics the way bees build comb in the wild. This provides a more natural environment for the bees, encouraging them to construct comb in a way that aligns with their instincts.
- Multiple Colonies in One Hive: The Long Langstroth hive is well-suited for beekeepers interested in maintaining multiple colonies within a single hive. This makes it an excellent choice for those looking to expand their apiary while maintaining efficient hive management.
Now that we have a better understanding of the Long Langstroth beehive, let’s embark on the journey of constructing your hive.
Step 1: Building the Lid
- Screw Together the Triangular Ends:
- Align the triangular ends with the long side and secure them together using screws.
- Attaching Timber to Roof Frame:
- Separate the tin from the timber boards.
- Screw or nail the timber to the roof frame, ensuring an 80mm overhang on all three sides.
- Place the tin back onto the timber panels.
- Securing Tin with Ridge Capping:
- Place the long ridge capping on top of the tin.
- Use longer screws to secure the ridge cap at the ends and a couple of shorter screws in the centre to hold the tin in place. (See Video Below)
Step 2: Building the Beehive
- Screwing the Sides Together:
- Assemble all four sides of the beehive by using three screws in each corner.
- Attaching Bottom Boards:
- Turn the beehive upside down.
- Place the bottom boards with the mesh facing inside the box and the cut-out panels facing up.
- Ensure an overhang on the sides of the bee entrances.
- Screw down the bottom boards, taking care not to obstruct the bee entrances.
Step 3: Assembling All Parts
- Adding Legs:
- Bolt on the legs, leaving them slightly loose initially.
- Tighten the legs once they are all attached and the hive is leveled.
- Attaching Knobs and Panel Latches:
- Add knobs and panel latches to the bottom of the beehive.
- Attaching Lid:
- Place the lid on top of the beehive.
- Attach hinges about 100mm in from each side, ensuring the screw length does not penetrate into the hive.
- Attaching Chain:
- Unscrew one screw from each side of the lid on the front face.
- Attach the chain to the lid, have a play to determine the best placement to the legs. Connect the other end of the chain to the hive leg.
- Final Touches:
- Double-check all screws and connections.
- Ensure the lid can be opened and closed smoothly.
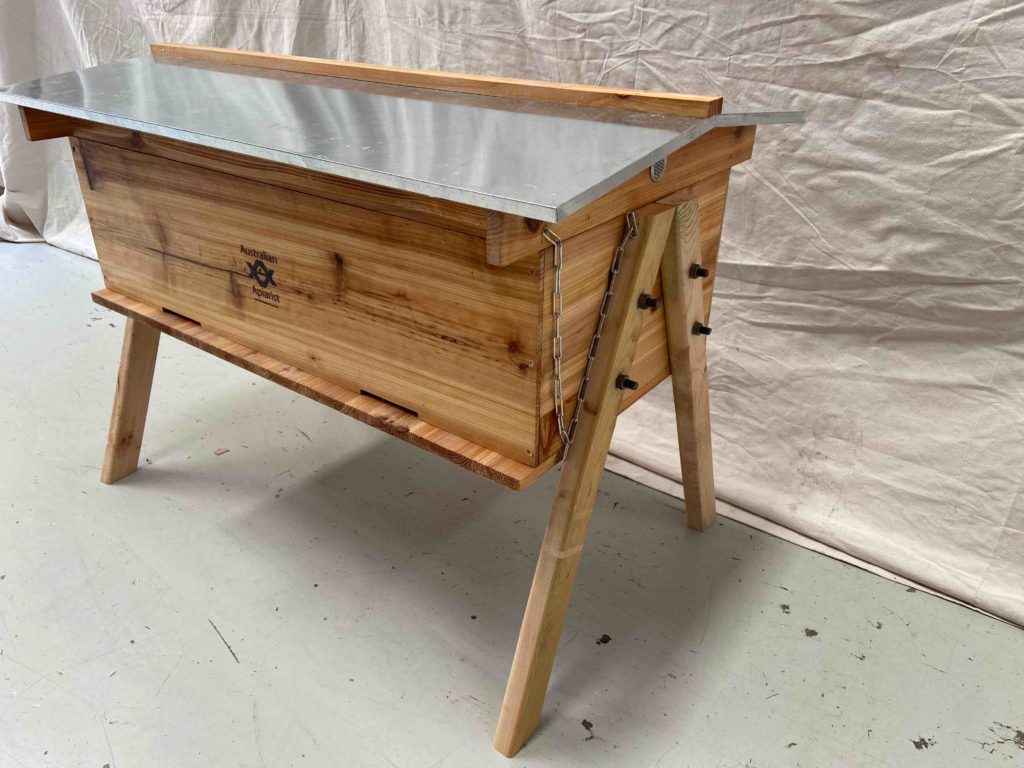
Congratulations! You’ve successfully built your Long Langstroth Beehive. Now, you’re ready to welcome a thriving bee colony into their new home. Happy beekeeping! 🐝✨